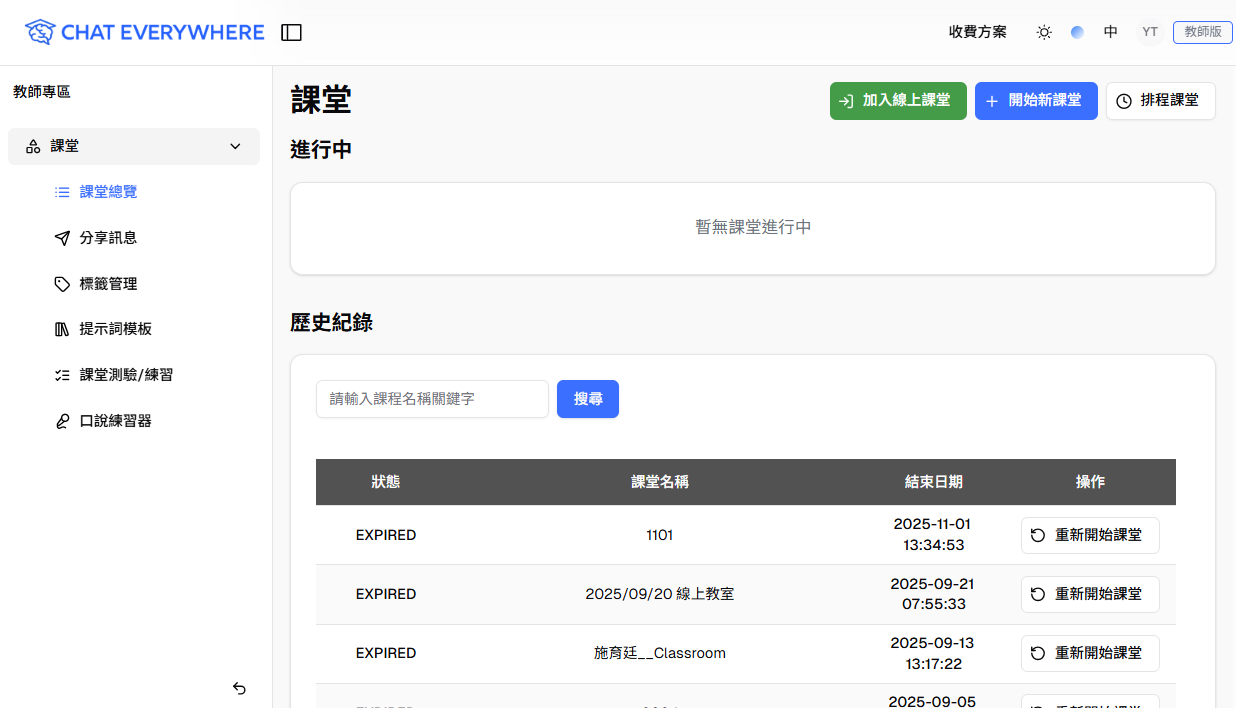
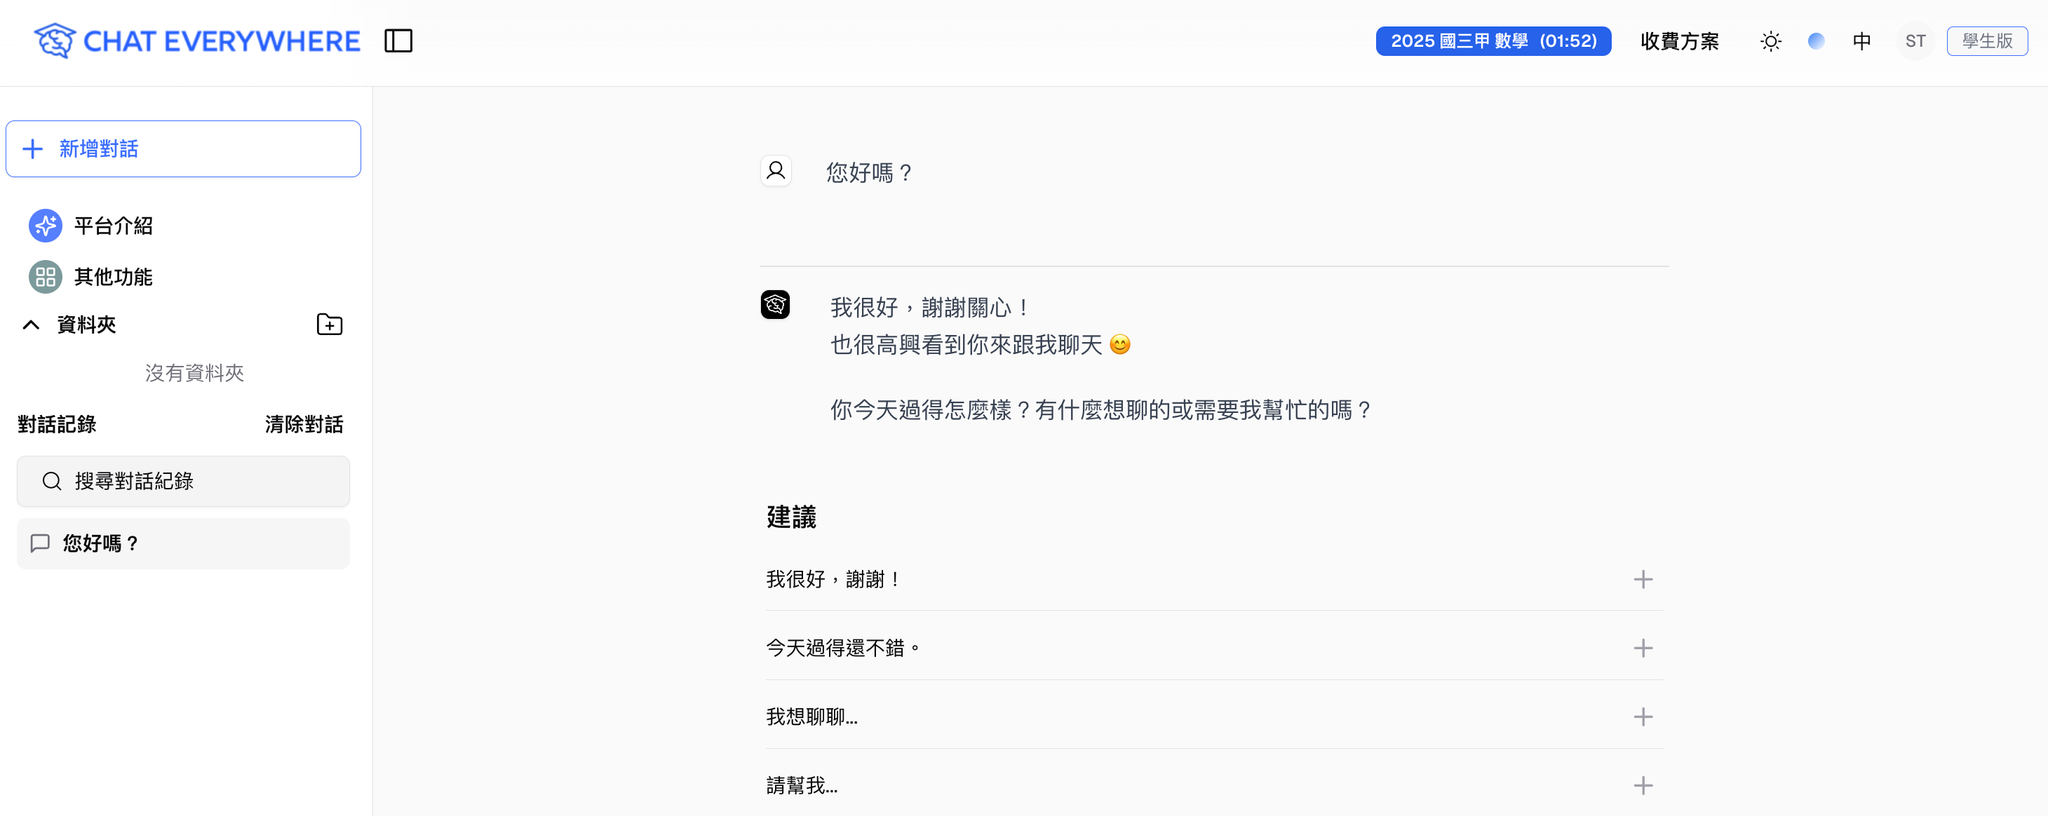
Class Sessions
Create a virtual classroom where students join by code and you monitor AI conversations in real time.
Overview
Class Sessions are the foundation of live teaching with Chat Everywhere. When you create a session, students join using a simple code, and you get a real-time view of every AI conversation happening in your class. From the session, you can push prompt templates, assign quizzes, share a group chat, and review what students are doing with AI — all as it happens.
After the session ends, you keep access to the full conversation history for each student, so nothing is lost.
How to Access
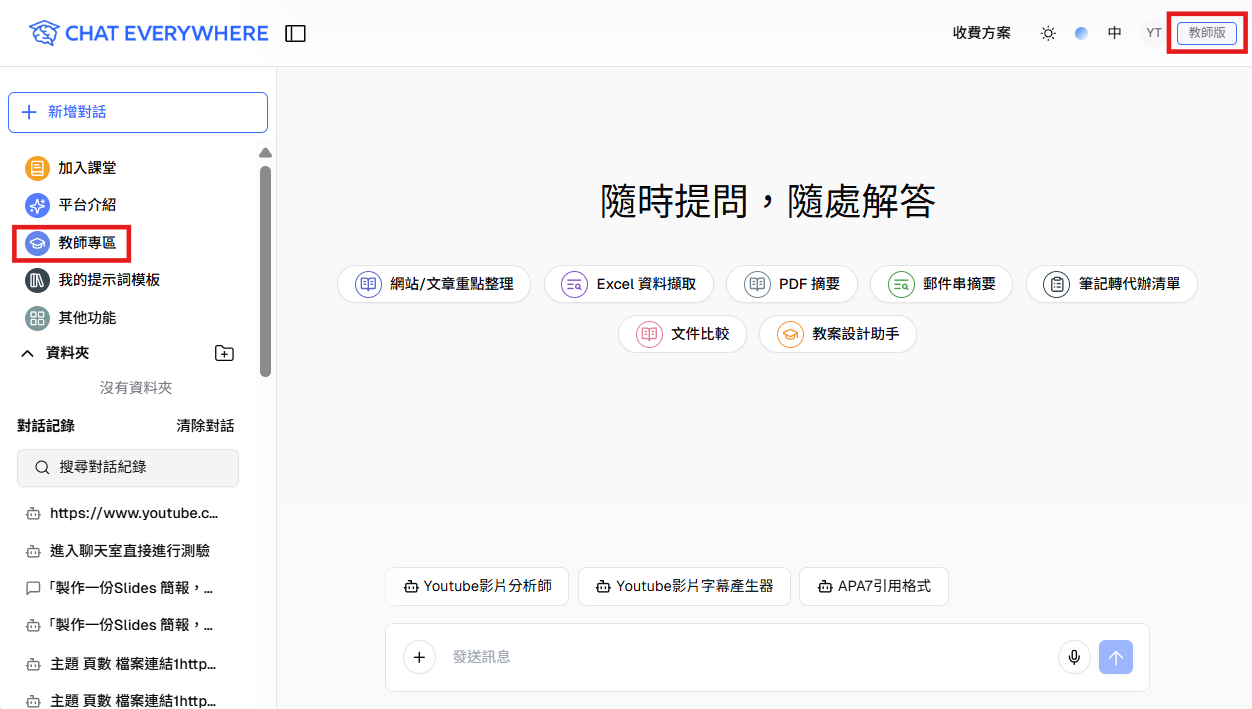
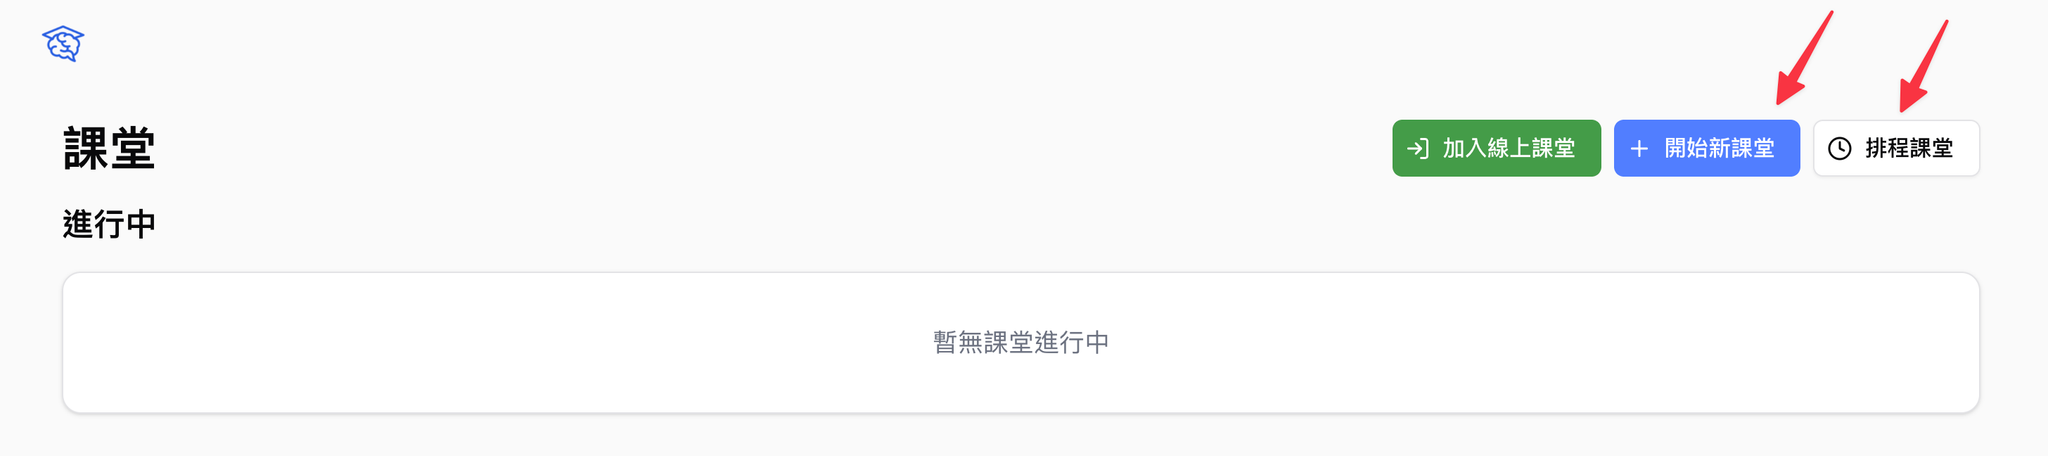
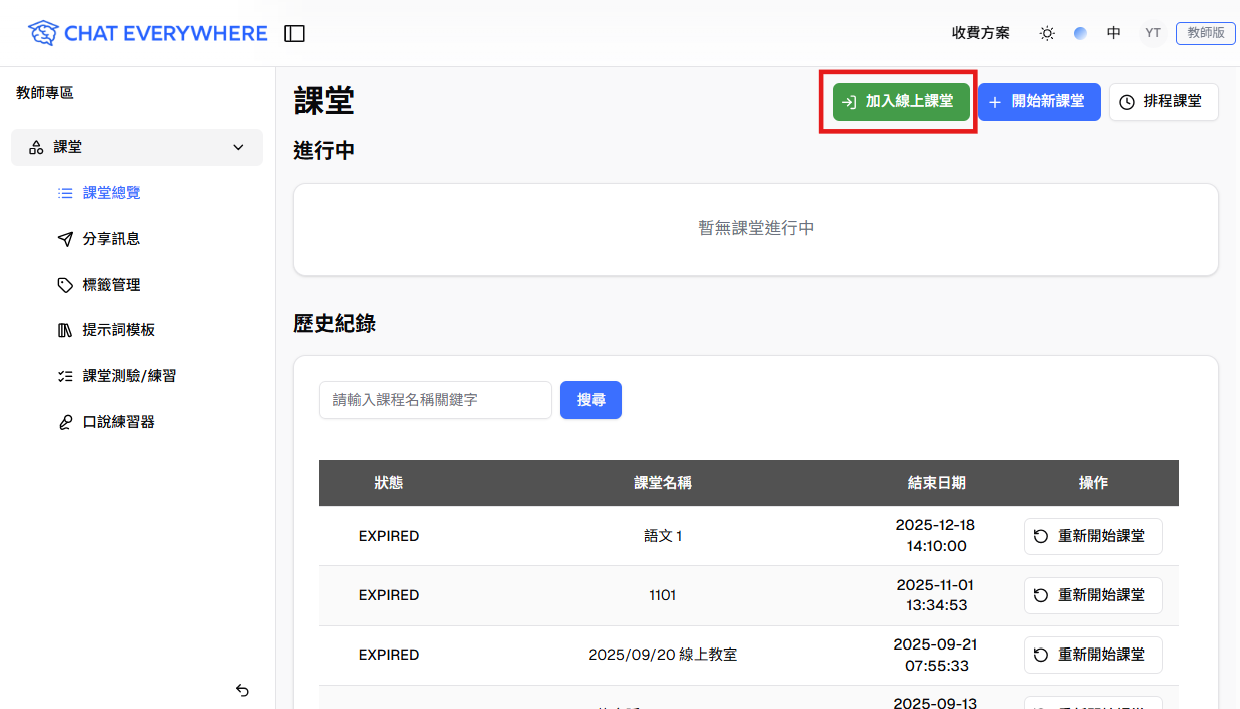
- Go to the Teacher Portal
- Click Class Sessions in the sidebar
- Click Create New Session
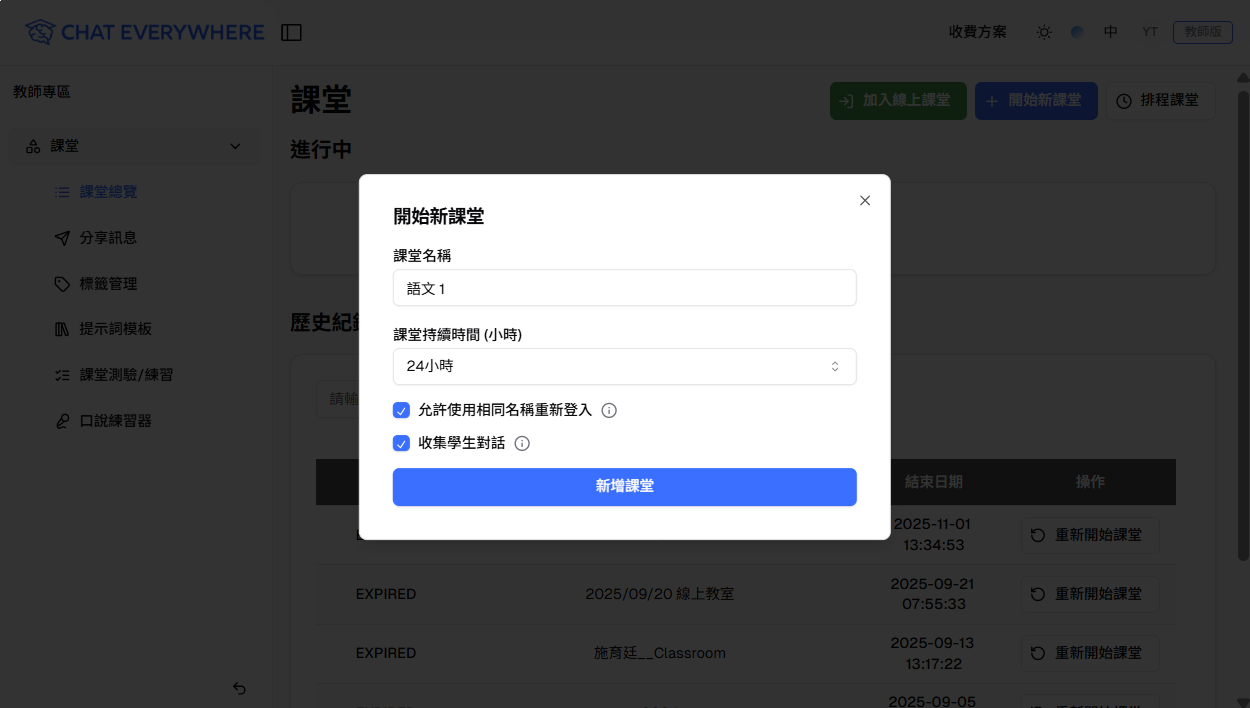
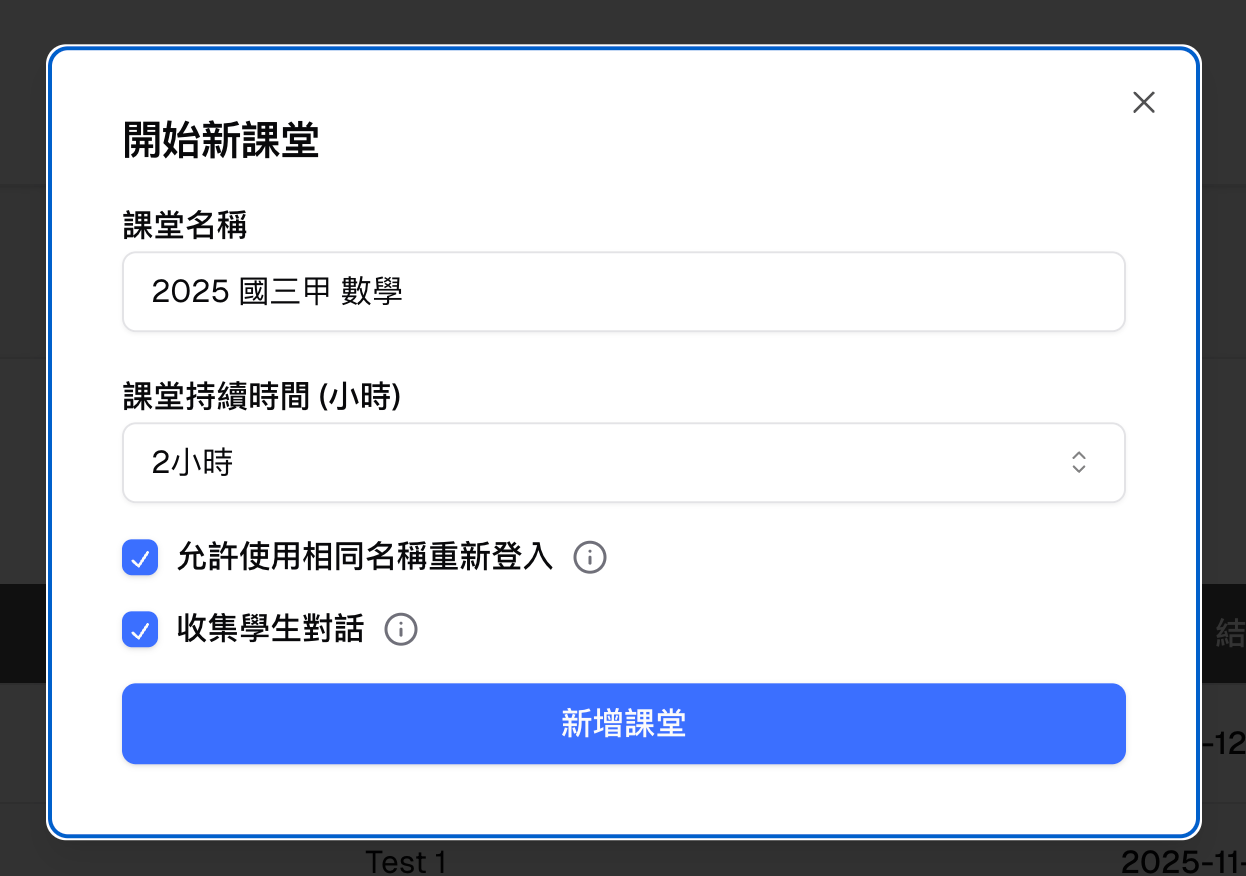
Creating a Session
- Click Create New Session from the Class Sessions page
- Give your session a name (for example, “Biology Period 3” or “English Writing Workshop”)
- Configure any session settings
- Click Create
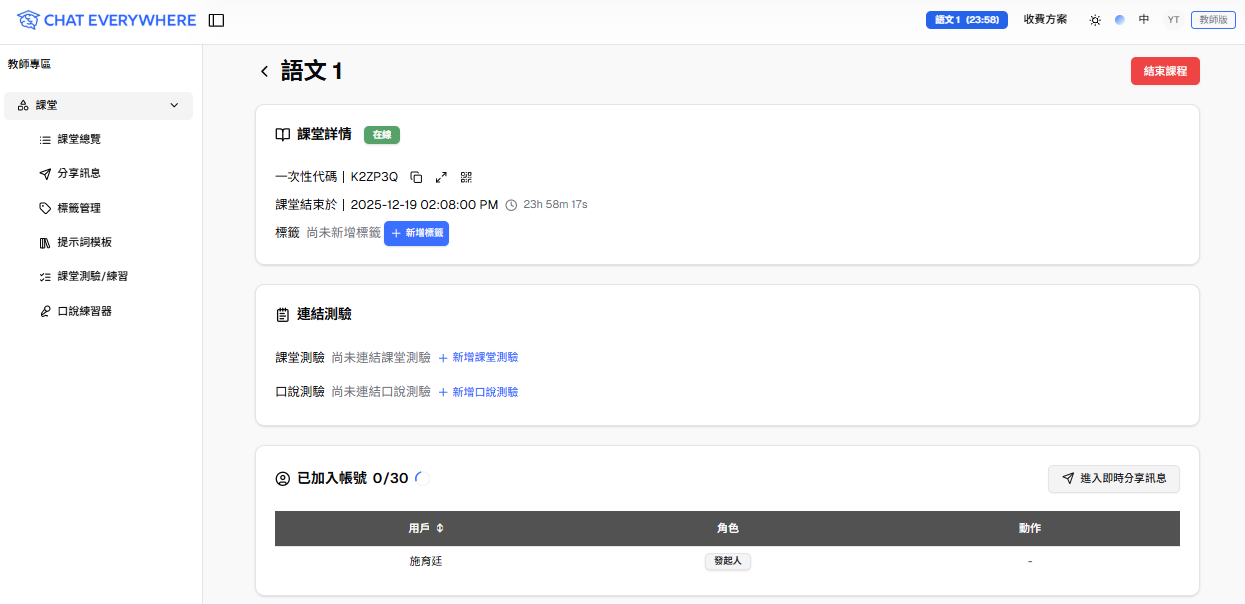
- The system generates a unique join code — you will share this with students
Once created, your session is active and ready for students to join.
Session Settings
When creating a session, you can configure two optional settings that control how students interact with the session. Both are enabled by default.
Allow login with same display name again
When this is turned on, a student who leaves and comes back can rejoin by entering the same display name they used earlier. They pick up right where they left off — their previous conversations, breakout room assignment, and other data are all restored. The student sees a message confirming they have rejoined.
When this is turned off, every login creates a brand-new account, even if the student types the same name. The student starts fresh each time with no access to anything from their previous visit.
Collect student conversations
When this is turned on, students’ AI chat messages during the session are shared with you. You can view each student’s conversation from the session detail page and export chat history after the session ends.
When this is turned off, student conversations remain private. You will not be able to view or export their AI chat messages from the session, even after it ends.
Session Limits
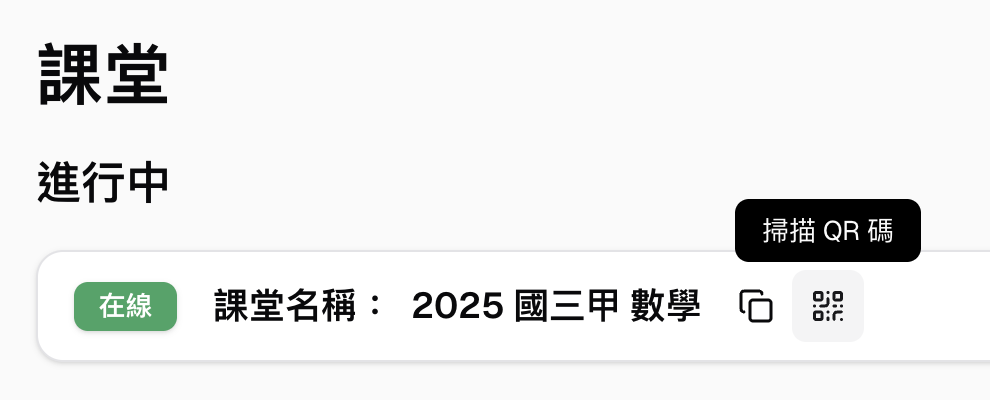
Each teacher can run one active class session at a time. A session can last up to 24 hours, and the join code remains valid only while the session is active. Students can join after the session starts, but they need to join before the session ends.
Use the session detail page to check which students have joined the current session and remove students if needed.
How Students Join
Students can join your session in two ways:
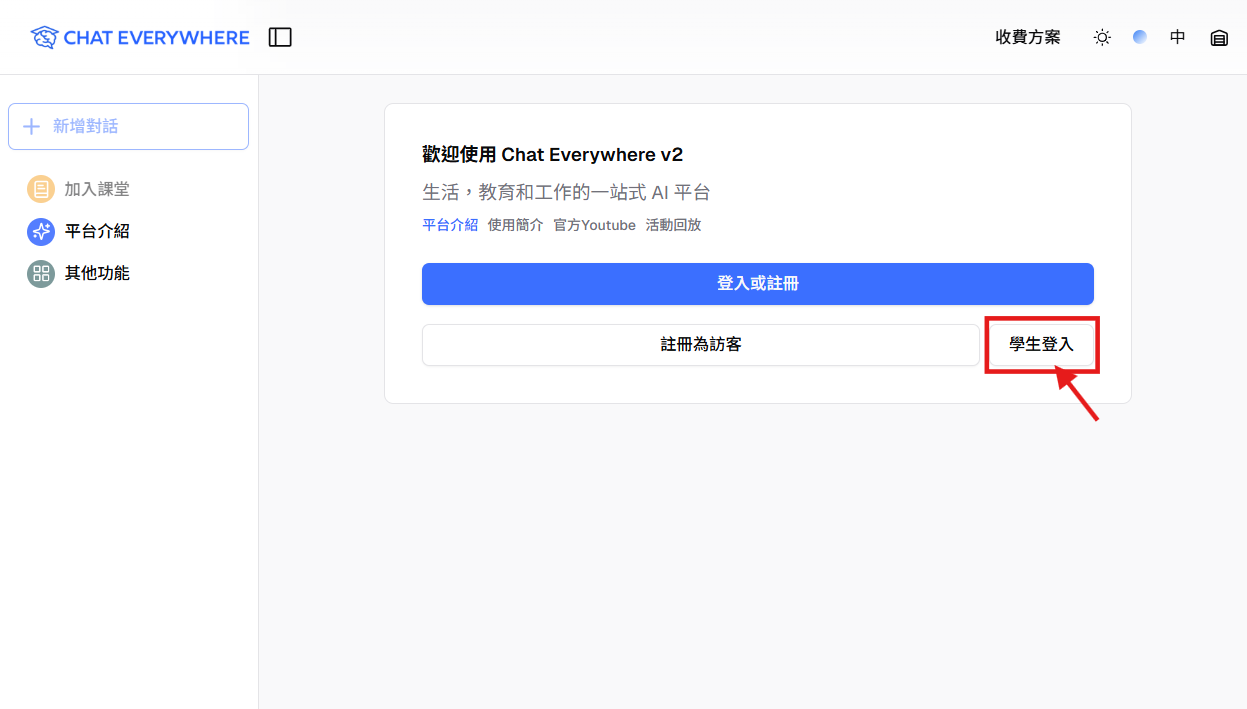
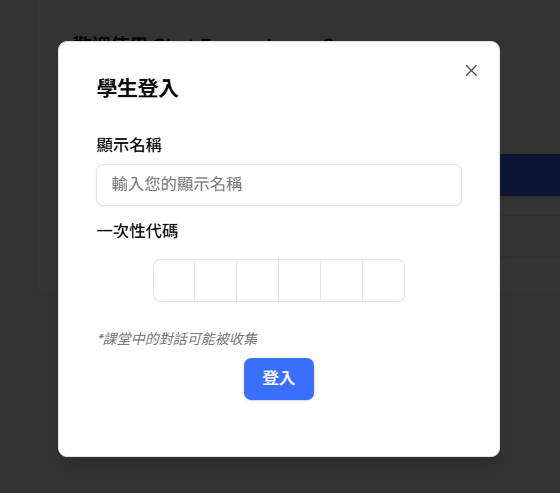
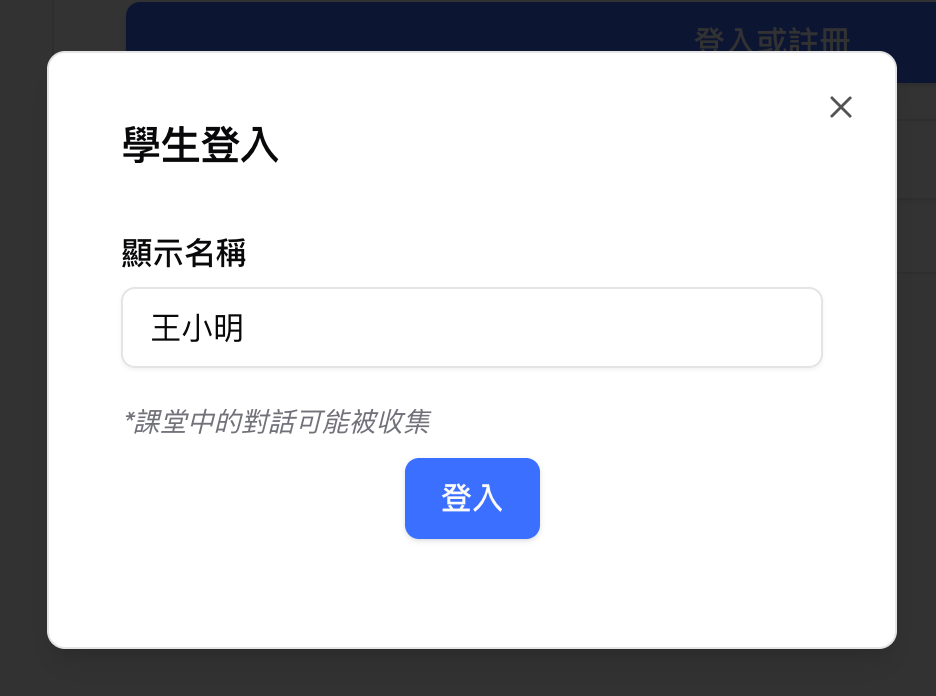
Option 1: Enter the code manually
- Student opens Chat Everywhere
- Student clicks the Student Login dialog
- Student types in the session code you provided
- Student clicks Join
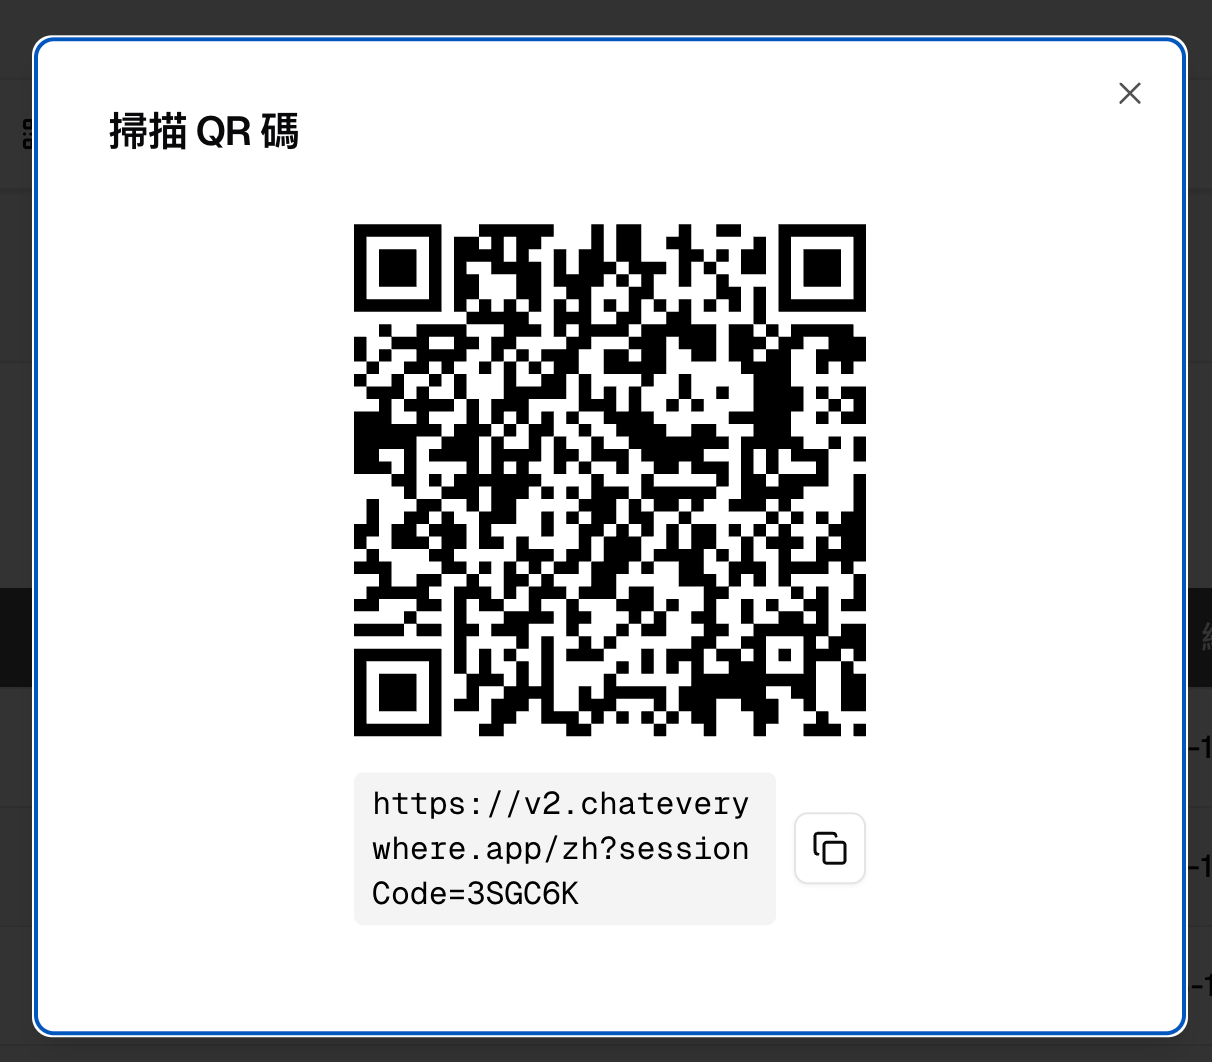
Option 2: Use a shared link
- You can share a direct URL that includes the session code as a parameter (the URL uses
?sessionCode=followed by your code) - When students open this link, they join the session automatically without typing anything
Tip: Project the join code on your classroom screen or write it on the board. Students only need to enter it once per session.
Students can start from the localized app entry point at https://v2.chateverywhere.app/zh , open Student Login, enter a display name, and submit the one-time code.
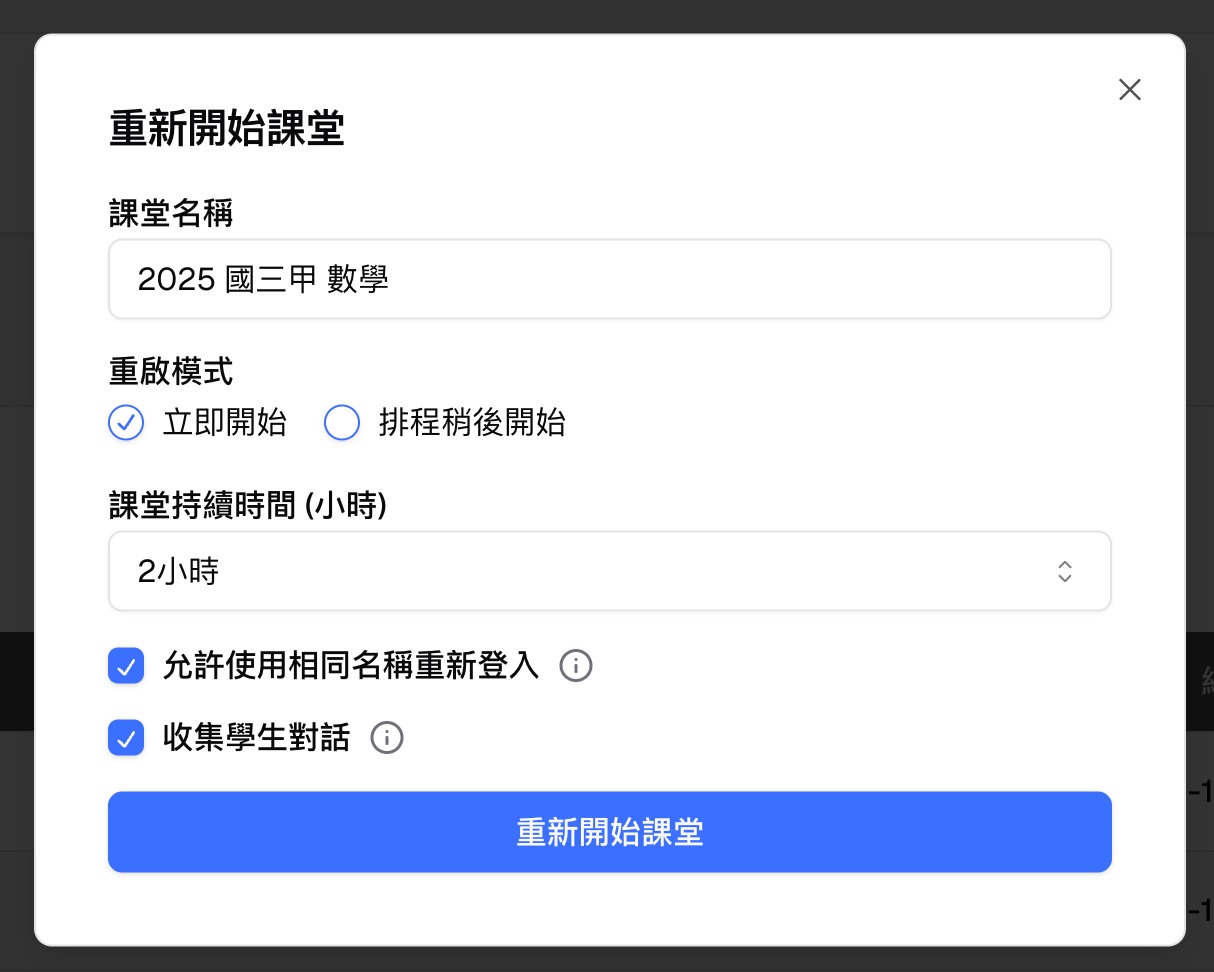
Reusing a Class Link and Restoring Student History
If you want to reuse the same class link or QR code for a follow-up activity, keep Allow login with same display name again and Collect student conversations enabled when you create the session. Students who return with the same display name can restore their previous class identity and conversation history while the session remains active.
This is useful when students close their browser by mistake, switch devices during class, or need to continue an activity without losing the AI conversation they already started.
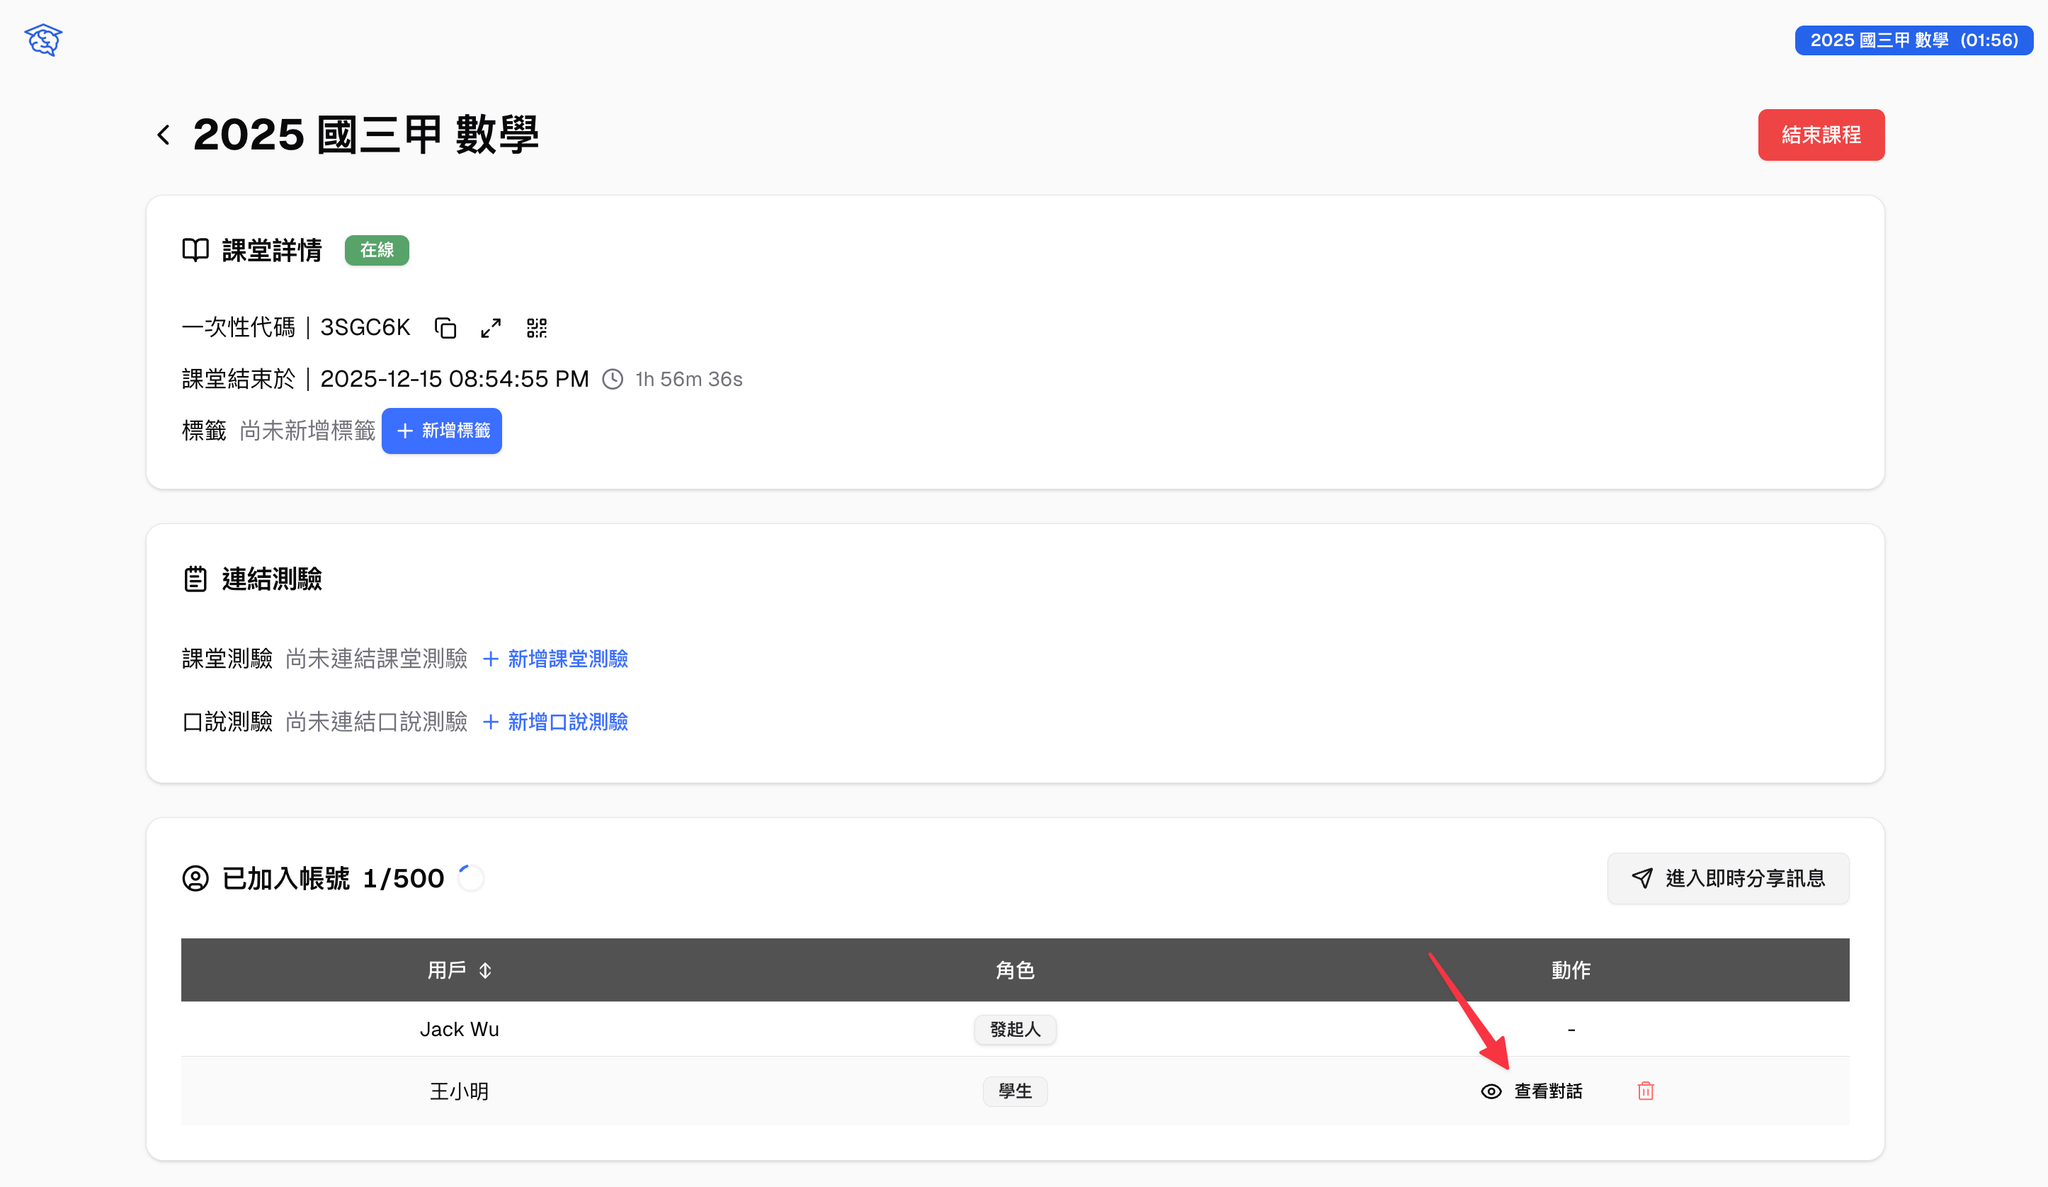


Monitoring Students in Real Time
Once students join and start chatting with the AI, you can see their conversations live from the session detail page.
- Open your active session from the Class Sessions list
- The monitoring view shows all connected students and their AI conversations
- Conversations update in real time — you see new messages as students send them
This lets you:
- Check whether students are on-task
- Spot students who need help
- See how students are using the AI for your assigned activity
- Identify interesting AI responses worth discussing with the class
Observing Another Online Class
Teachers with access or an invitation can join another active online class for observation. Use this workflow when a colleague wants to observe classroom activity without creating a separate session.

Sharing Prompts and Quizzes
During an active session, you can push resources directly to students:
Sharing a Prompt Template:
- From the session detail page, choose the option to share a Prompt Template
- Select the template you want to distribute
- Students receive it immediately in their Class Portal and can start a conversation using that template
Assigning a Quiz:
- From the session detail page, choose the option to assign an In-Class Quiz
- Select the quiz you want to distribute
- Students see the quiz appear in their Class Portal and can begin answering
Students do not need to navigate anywhere — the shared content appears for them automatically.
Managing Participants
From the session detail page, you can:
- See who has joined — a list of all connected students appears in the session view
- Remove a student — if someone joined by mistake or needs to be removed, you can remove them from the session
Ending a Session
When class is over:
- Open your active session
- Click the option to end the session
- The session moves from active to ended
What happens after a session ends:
- Students can no longer send messages or interact within the session
- You can still view the session detail page, including every student’s full AI chat history
- This history is useful for reviewing student work, checking engagement, or following up on specific conversations
Who Can Use This
- Teachers — Create, manage, monitor, and end sessions. View all student conversations during and after the session. This feature requires a Teacher plan.
- Students — Join sessions with a code, use AI chat, and access shared templates and quizzes through the Class Portal.
Related Features
- Session Chat Room — A shared group chat for everyone in your session
- Share Messages — Students submit specific AI responses for your review
- Prompt Templates — Create structured prompts and push them to students
- In-Class Quiz — Create and assign AI-generated quizzes
Common Questions
Students say they can’t find the join code. Make sure you are sharing the correct code displayed on the session detail page. The code is generated when the session is created and does not change. You can also share the direct link instead.
I can’t see any student conversations. Students need to actually start chatting with the AI for conversations to appear. Confirm that students have successfully joined (they should appear in the participant list) and have begun sending messages.
Can I reuse a session link or QR code? You can reuse the same active session link or QR code during the session. If you end the session and create a new one, the system generates a new code. To let students return without losing their work, keep “Allow login with same display name again” and “Collect student conversations” enabled before students join.
Can students join after the session has started? Yes. Students can join an active session at any time. They do not need to be present when you first create it.
What happens to student conversations after the session ends? You can still view each student’s AI chat history from the session detail page, as long as “Collect student conversations” was turned on when they joined. Students lose access to the session view, but their regular chat history remains in their own account.
Can I change session settings after students have already joined? Session settings like “Allow login with same display name again” and “Collect student conversations” are set when the session is created. If you need different settings, you can end the current session and start a new one with the updated configuration.