Message Board
Students post AI responses or selected text from their chat to the Message Board, and teachers review, give feedback, and grade them.
Looking for a shared wall where the whole class can read and discuss contributions? See CE Board.
Overview
Message Board (previously called Share Messages) creates a feedback loop between students and teachers. During a class session, students can post a full AI message or a selected excerpt from their chat, optionally with a note. You see every post in the teacher dashboard, where you can write feedback, give a score, organize with tags, and track which posts are still waiting for a reply. New posts arrive in real time, so you can follow along as students work.
Students have their own Message Board page where they can review everything they posted and read your feedback and scores. Each student sees only their own posts, never those of other students.
For a walkthrough, watch the Message Board tutorial below.
How to Access
Teachers:
- Go to the Teacher Portal
- Click Message Board in the sidebar
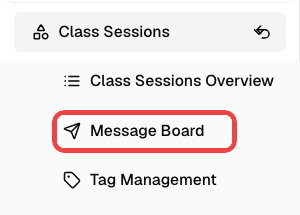
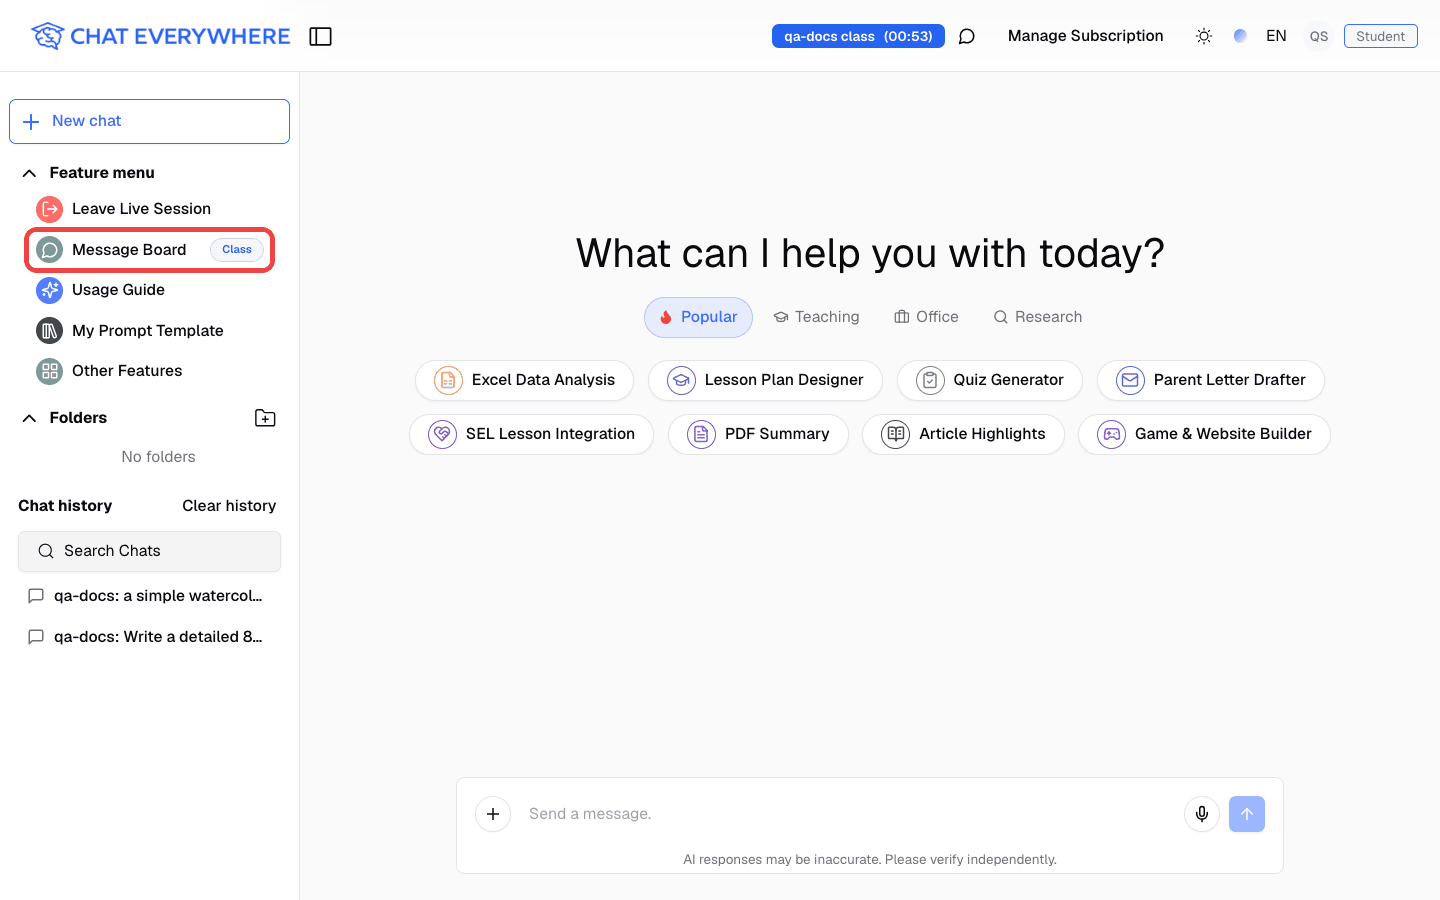
During a live session, a Message Board entry also appears in the main sidebar and opens the live Message Board page.
Students:
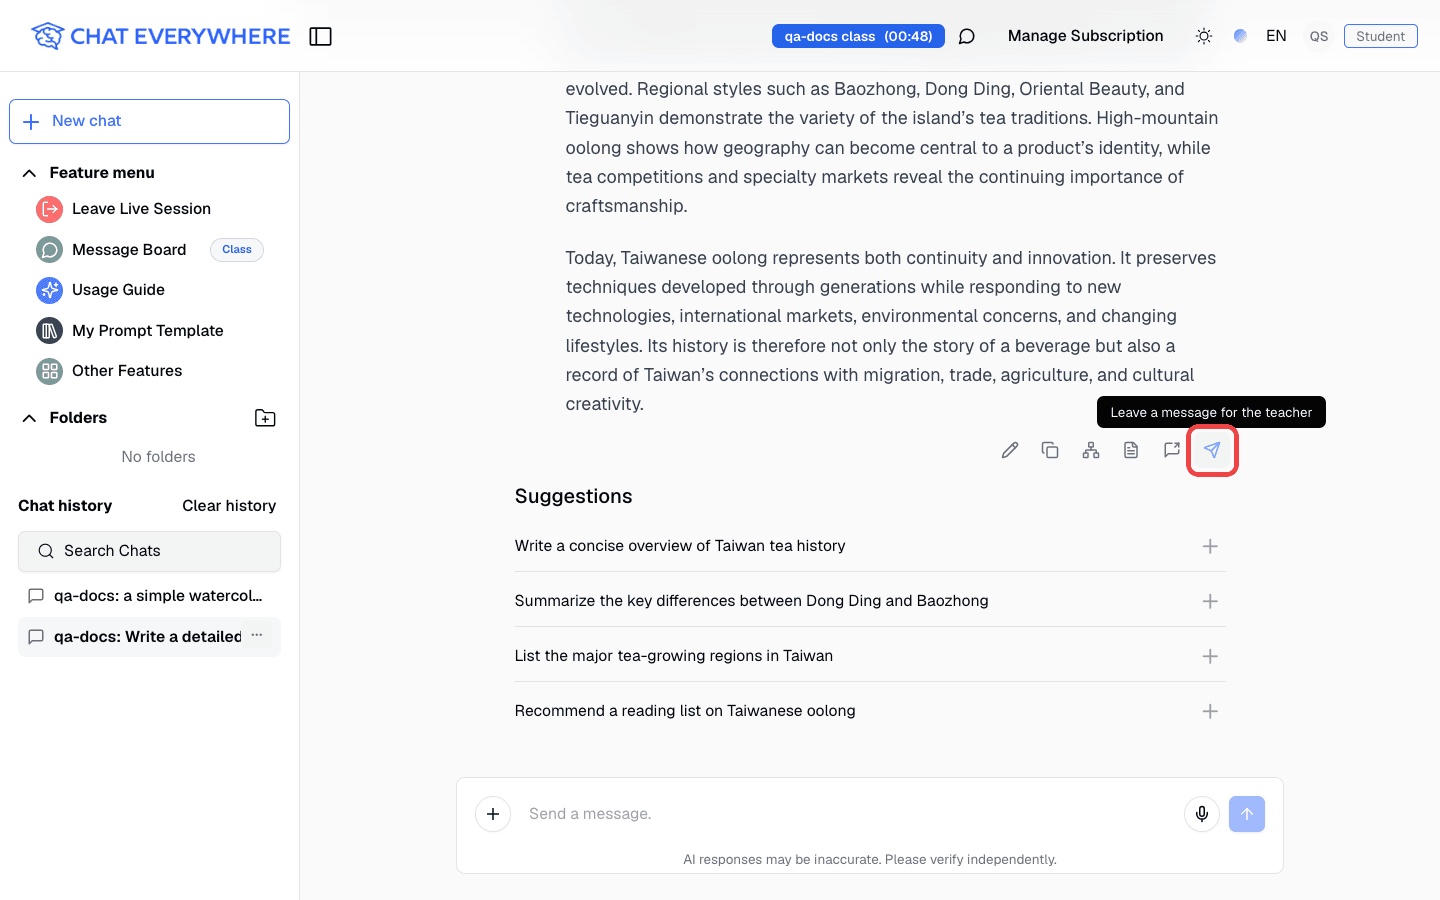
- To post a message: During an active class session, open an AI conversation and use the Message Board action on a message, or highlight text and choose Post selected text to Message Board
- To review posts and feedback: During a live session, click Message Board in the sidebar. When you are not in a live session, open Other Features and choose Message Board (“Review your class messages and teacher feedback”)
Posting is only available while the student is in an active class session. Reviewing past posts and feedback is available at any time with a signed-in account.
Student Flow: Posting a Message
- Start or continue an AI conversation during a class session
- Post content to the Message Board in one of two ways:
- Share the whole message — In the row of icons under an AI answer, click the paper-plane icon (Leave a message for the teacher)
- Share selected text — Highlight text in a chat message, then choose Post selected text to Message Board
- In the Add Note to Share dialog, optionally add a note for your teacher
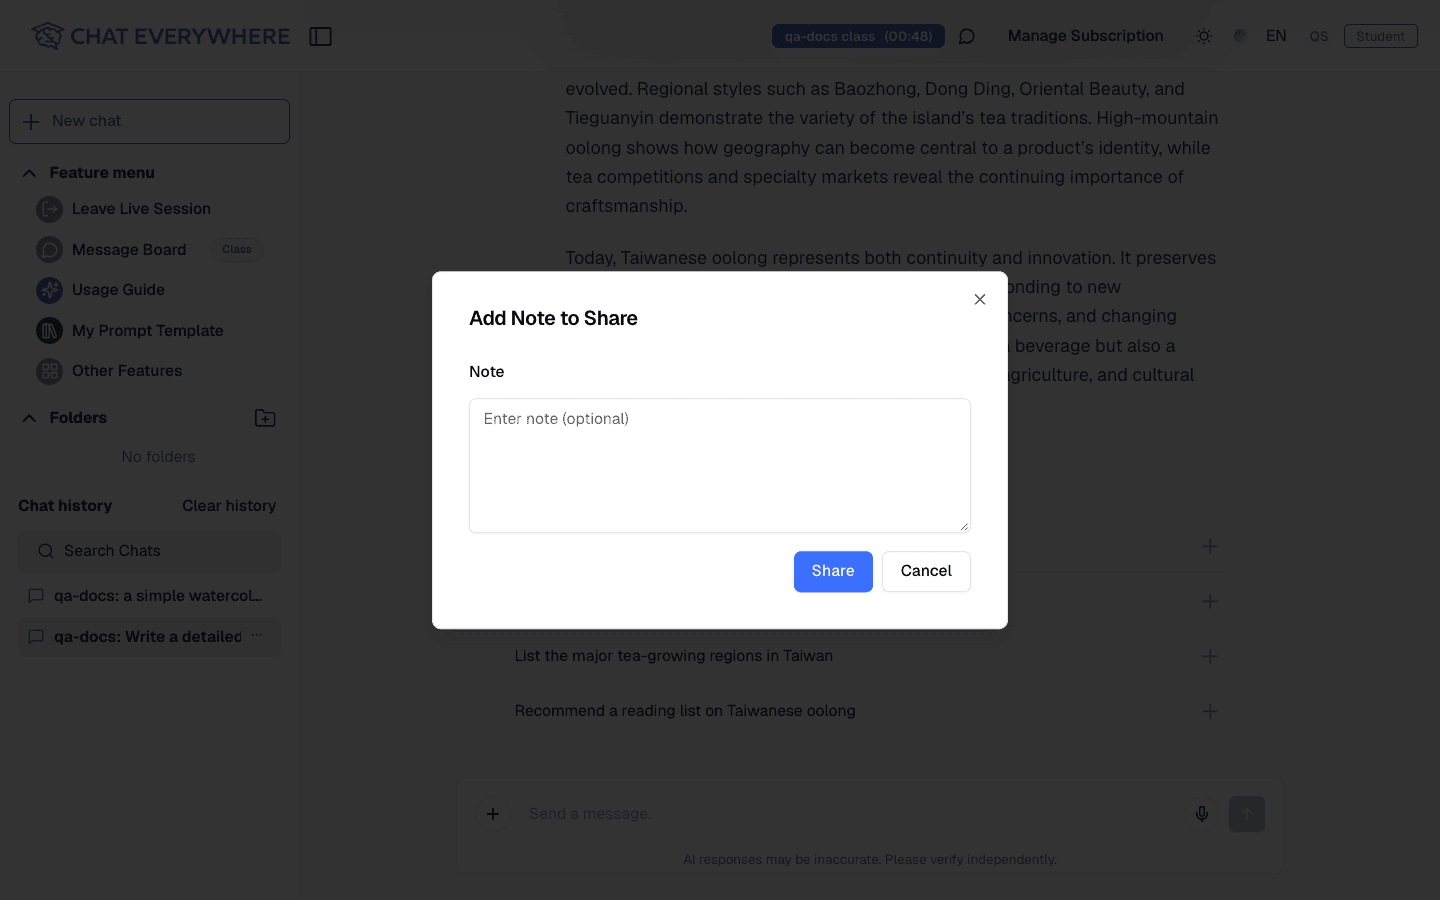
- Confirm to post
- A confirmation appears: “Message posted to Message Board”
Students can post as many messages as they like during a session. Each post is tracked separately.
Student Flow: Reviewing Posts and Teacher Feedback
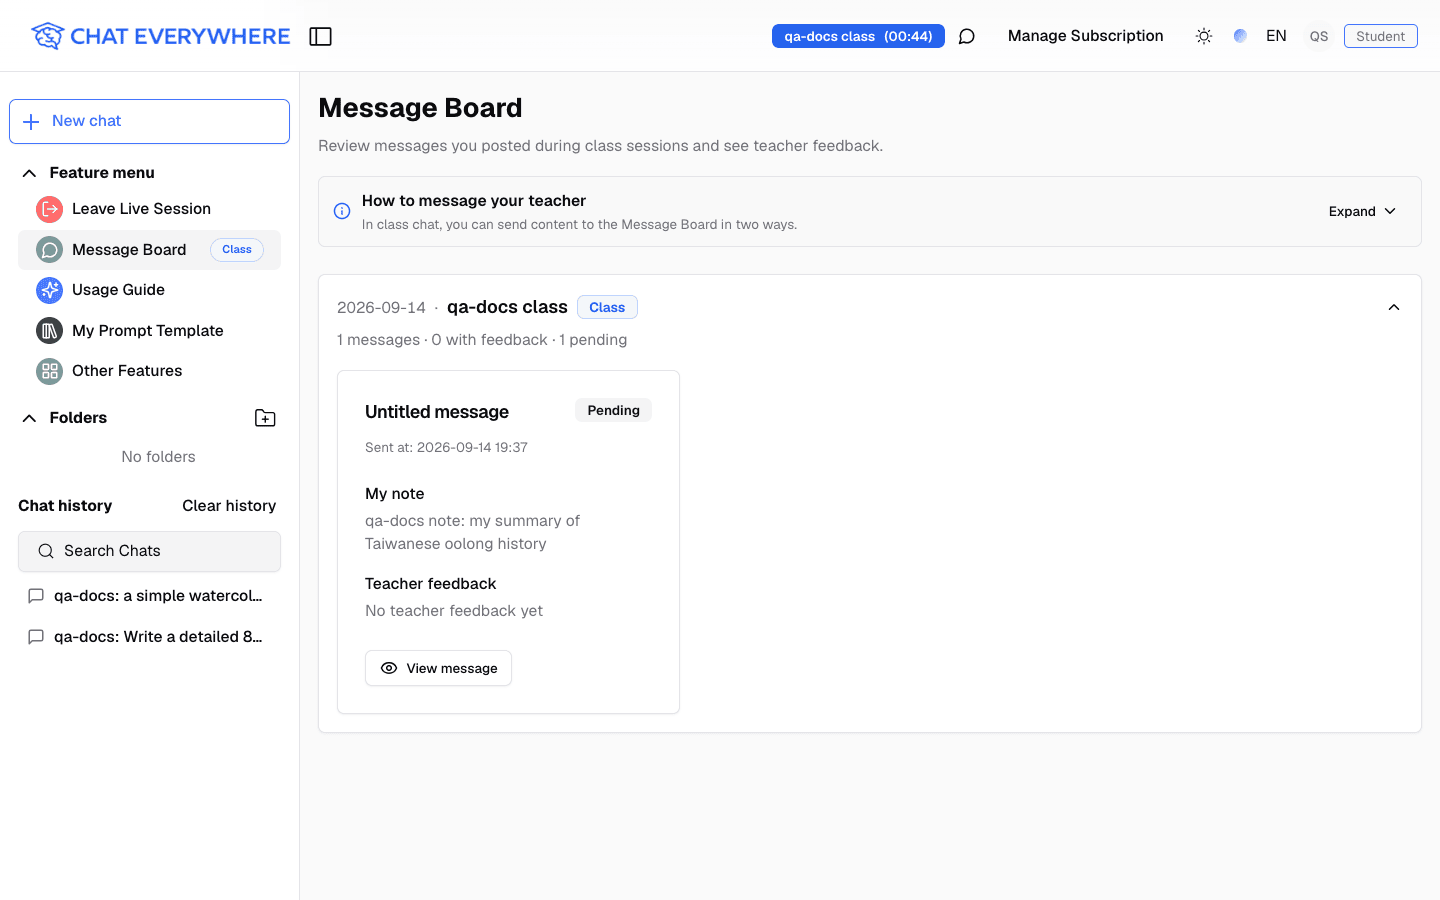
The student Message Board page lists the student’s posts grouped by class session. During a live session, the page also shows a short “How to message your teacher” guide.
- Open Message Board from the sidebar (during a live session) or from Other Features
- Expand a class session. The summary shows how many messages were posted, how many have feedback, and how many are still pending
- Each message card shows:
- A Pending or Feedback given status
- When the message was sent
- My note — The note the student added when posting
- Teacher feedback and Score — Shown once the teacher responds
- Click View message to open the full post. For a shared AI message, the conversation is shown with the shared message highlighted, next to the teacher’s feedback
When a teacher adds or updates feedback or a score, the student gets a notification (“Your teacher updated Message Board feedback”) with a View message link, and a red dot appears on the Message Board entry until they view it.
The student page is read-only. Students can add a note when they post a message, but they cannot reply to teacher feedback from the Message Board.
Teacher Flow: Reviewing Posts
When you open the Message Board dashboard, you see student posts across your sessions.
- Live feed — During an active session, the Live Message Board page shows new posts in real time as students send them
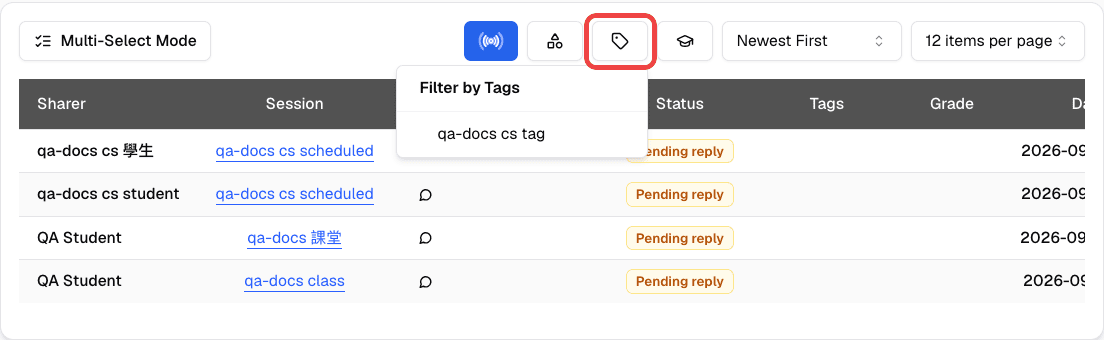
- Post list — Each entry shows the student name, the posted content, the class session, a Status of Pending reply or Feedback given, and the score
- Notifications — A red dot on the Message Board sidebar entry and on a post’s status shows you when there are new posts you have not opened
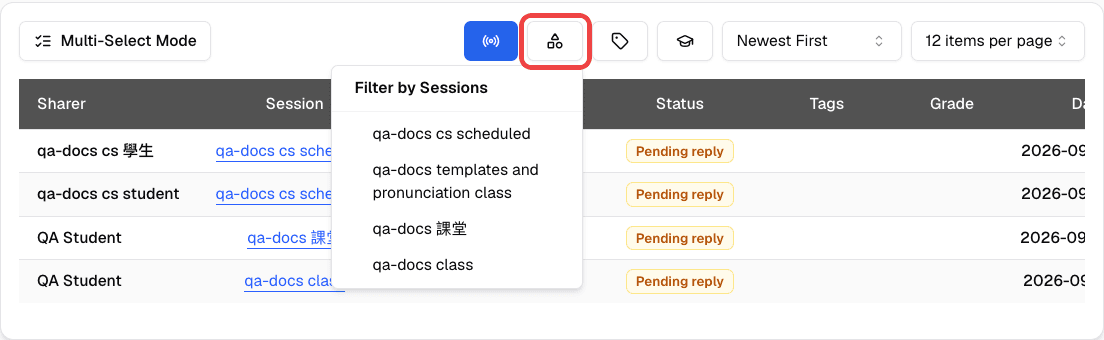
- Search and filter — Find posts by student name, class session, tags, or grade
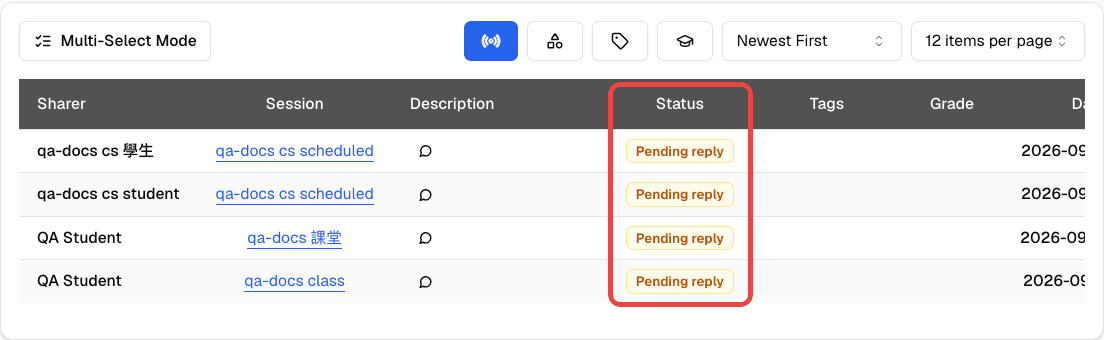
In the table, clicking the class session name takes you to that session’s page. Clicking anywhere else in the row opens the post’s detail dialog.
Use the live page during class when you want to follow student work as it happens. Use the management page after class to review older posts, filter by class session, or organize work by tags.
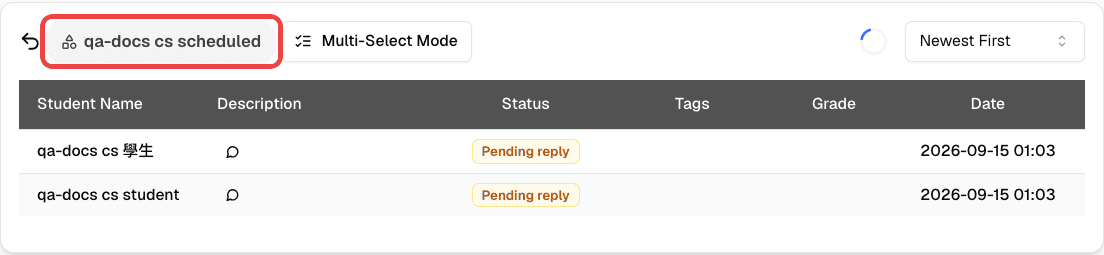
On the management page, use the session and tag icons above the table to narrow the list.
Grading and Feedback
To respond to a student post:
- Open the post from the dashboard
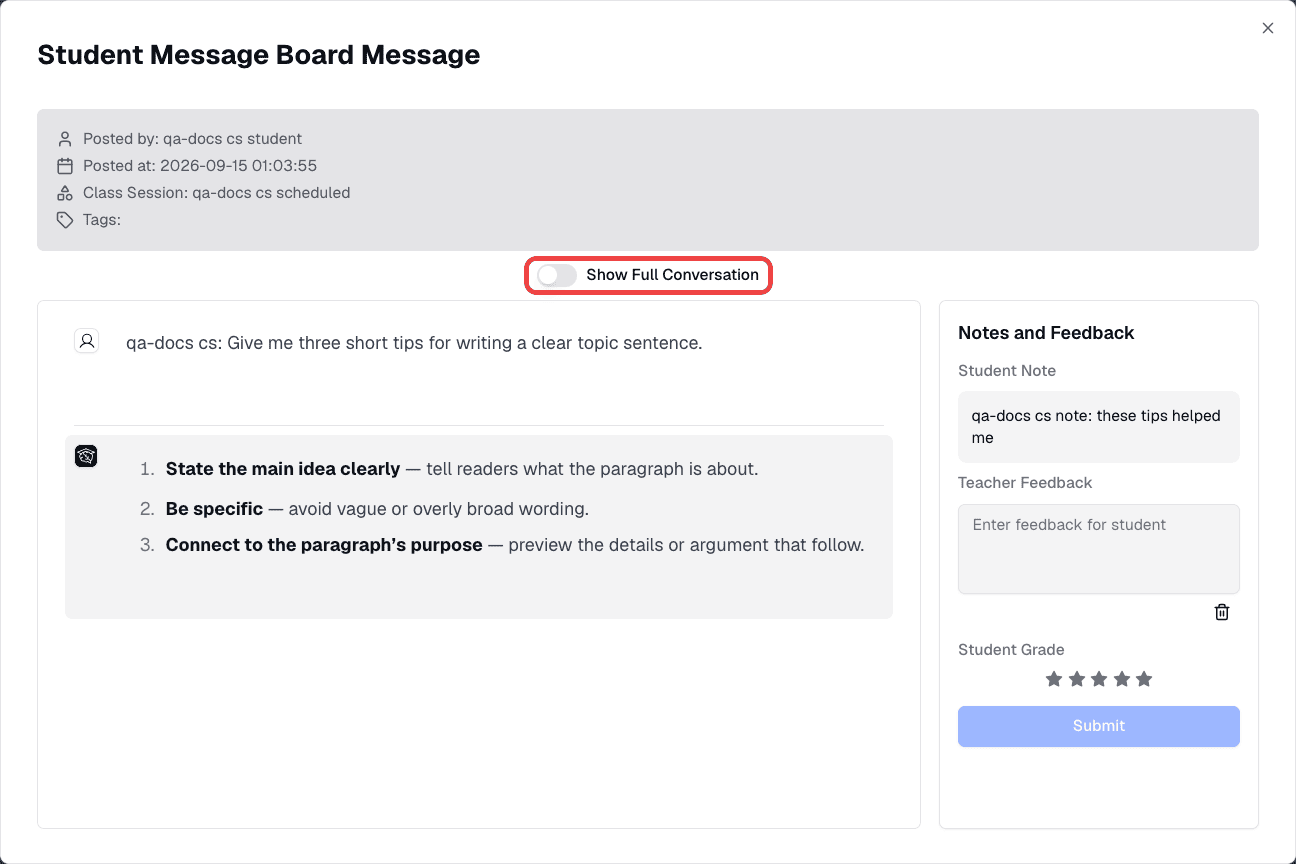
- Read the Student Note, if the student added one
- Give a Student Grade using the star rating (1 to 5 stars)
- Write Teacher Feedback in the text area
- Click Submit
Once you save feedback or a score, the post’s status changes to Feedback given. The student is notified and can see your response on their Message Board page.
From the detail view, you can inspect the posted message. Turn on Show Full Conversation to see the student’s whole conversation and understand the context behind the post.
Organizing with Tags
Tags help you categorize posts so you can find and group them later.
- Open a post
- Click to add one or more tags
- Choose from your existing tags or go to Tag Management to create new ones
Tags attached to a class session are applied automatically to posts made during that session.
Example tag systems:
- By topic: “Photosynthesis”, “Cell Division”, “Genetics”
- By quality: “Excellent”, “Needs Improvement”, “Redo”
- By assignment: “Week 1 Activity”, “Midterm Review”
Who Can Use This
- Teachers — View all posts, give scores and feedback, apply tags, and track which posts still need a reply. This feature requires a Teacher plan.
- Students — Post AI messages or selected text during active class sessions, and review their own posts, teacher feedback, and scores on the Message Board page. Students only see their own posts.
Related Features
- Class Sessions — Students post to the Message Board during live sessions
- Session Chat Rooms — For class-wide group conversation instead of private posts to the teacher
- Tag Management — Create and manage the tags you apply to posts
- In-Class Quiz — Another way to assess student work, with auto-grading
Common Questions
Students don’t see the Message Board action on messages. Posting only works during an active class session. Make sure the student has joined the session and the session is still active (not ended).
Can students see other students’ posts? No. Each student can only see their own posts. Only the teacher sees all posts in the dashboard.
Do students see my scores and feedback? Yes. Once you save feedback or a score, the student gets a notification and can read it on their Message Board page.
Can students reply to my feedback? Not from the Message Board. Students can add a note when they post a message, and they can post again during a live session if they have more to share.
Where do students find their posts after class ends? Signed-in students can open Other Features and choose Message Board to review posts and feedback from earlier class sessions.
Clicking a row took me to the class session instead of opening the post. Clicking the class session name opens that session’s page. Click another part of the row to open the post’s detail dialog.