Your First Class
Run one live AI lesson from start to finish in seven steps.
Overview
This quickstart takes you through one complete class: start a session, get students in, follow their work, and end the session. Each step links to the detailed guide when you want more.
You only need the defaults to get started. You can fine-tune settings, scheduling, and activities later.
Before You Start
- A Chat Everywhere account on the Teacher plan
- A way to show a code or QR code to students, such as a projector
- A device with a web browser for each student
Step-by-Step Guide
1. Sign In with Your Teacher Plan Account
Go to v2.chateverywhere.app and sign in with your Teacher plan account.
2. Open the Teacher Portal
Open the Teacher Portal. It opens on the Class Sessions page.
Can’t find it? See How to Access.
3. Start a New Session
- Click Start new session
- Enter a Session name, such as “Grade 8 Science”
- Under Session duration, choose a length that covers your lesson
- Keep Allow login with same display name again and Collect student conversations turned on. Students can then rejoin if they close the browser, and you can read their AI chats.
- Leave Enable auto breakout assignment off unless you plan group chats
- Click Add Session
The session goes live right away. More details: Creating a Session and Session Settings.
4. Share the Code with Students
On the session page, find the Class Session code.
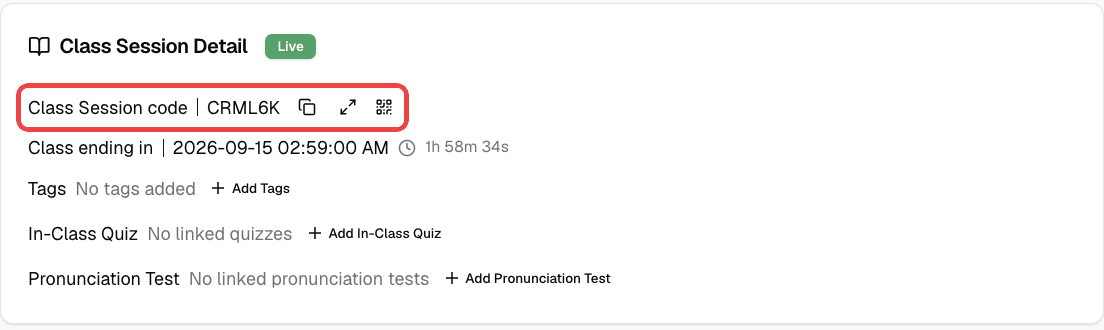
- Click the expand icon to show the code in large text on your projector
- Click the QR code icon to open Scan QR Code for students to scan
- Click the copy icon and choose Copy all details to paste the class link and code into a message
More details: Copying Class Details.
5. Have Students Sign In
Ask students to:
- Open Chat Everywhere
- Click Sign in as student
- Enter a display name and the code, then click Login
If they use your link or QR code, the code is filled in for them. Students don’t need their own account. Ask them to use a name they can type the same way again, such as their full name or student number.
More details: How Students Join.
6. Follow the Class
Back on the session page:
- Joined Accounts shows how many students are online. Use the Online and Offline tabs to see who is here.
- Click View Chats next to a student to read their AI conversations.
- Click Add In-Class Quiz to link a draft quiz to the session.
- Open the group chat from the message icon in the header. See Session Chat Rooms.
More details: Monitoring a Live Session.
7. End the Session
- Click End Class Session
- Read the warning and confirm
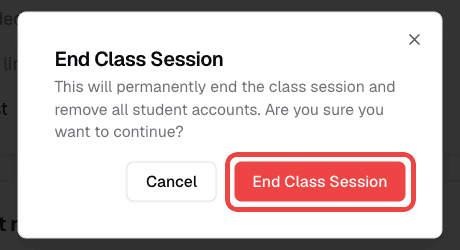
The session moves to the History tab. Student accounts created with the code are removed, but you can still open the session to read collected conversations or click Export Chat History. To teach the same class again, use Restart session.
More details: Ending a Session and Restarting an Ended Session.
Plans & Access
| Role | What you need |
|---|---|
| Teacher | A Teacher plan account |
| Student | The code, link, or QR code from the teacher. No account needed. |
Related Features
- Class Sessions — Full reference for sessions, limits, and student data
- In-Class Quiz — Create and assign AI-generated quizzes
- Session Chat Rooms — Group chat and breakout rooms for your class
- Teacher Portal — Map of all teacher tools
Troubleshooting
Start new session is grayed out. Hover over the button to see why. You may already have a live session, or your account may have no student slots.
Students see “Session hasn’t started yet”. The session is scheduled for later. Click Start Now on the session row to start it immediately.
Students see “Session code is invalid”. Check the code for typos. The session may also have ended.
Students see “Class session is full”. The session has reached your account’s student limit. See When the Class Is Full.