Image Generation
Create and edit images directly in chat using plain-language prompts.
Overview
Image Generation lets you describe the image you want, send the prompt, and get the result inline in the conversation. You can use it for illustrations, marketing visuals, concept art, posters, icons, product mockups, and more.
Chat Everywhere currently supports two image models for this mode: GPT Image 2 and Nano Banana 2. Both are designed for prompt-based image creation, and you can keep refining the result in the same conversation until it matches what you need.
You can also open an image created with GPT Image 2 on the whiteboard, paint over just the part you want to change, and describe the change. The AI edits that area and keeps the rest of the image the same.
How to Access
- Open a chat conversation.
- Click the mode selector in the chat toolbar.
- Select Create Image.
- Enter your prompt and send it.
Key Features
- Generate images from text prompts.
- Refine results by sending follow-up instructions in the same chat.
- Edit an uploaded image by describing the changes you want.
- Edit part of a generated image on the whiteboard by marking the area to change.
- Ask for different styles, layouts, aspect ratios, or backgrounds.
- Download the generated image after it appears in the conversation.
Step-by-Step Guide
Generate a New Image
- Switch to Create Image mode.
- Describe the image you want in the message box.
- Send the prompt.
- Review the generated image in the conversation.
- If needed, send another prompt to refine the result.
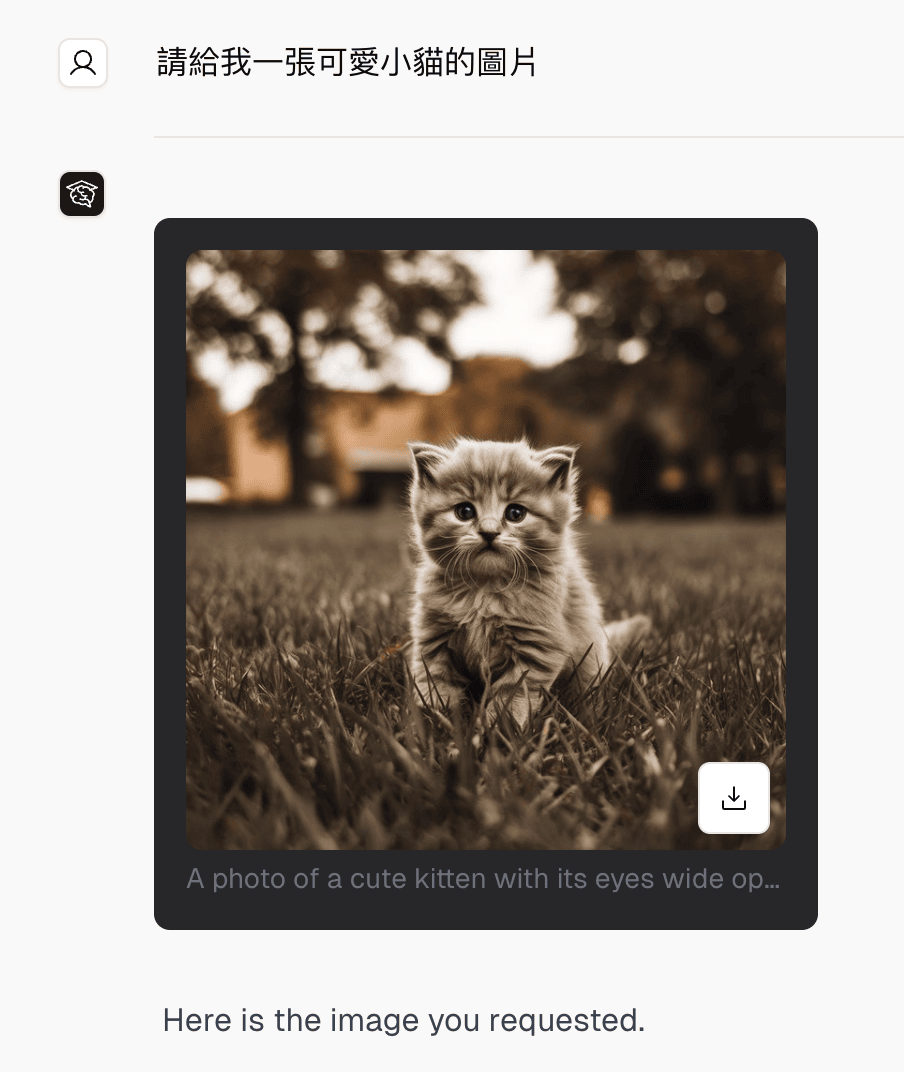
Example prompt:
Create a clean product hero image of a silver laptop on a light gray background, soft studio lighting, realistic style, wide composition.Edit an Existing Image
- Switch to Create Image mode.
- Upload the image you want to edit.
- Describe the exact changes you want.
- Send the prompt and review the updated version.
- Repeat with follow-up instructions if you want more revisions.
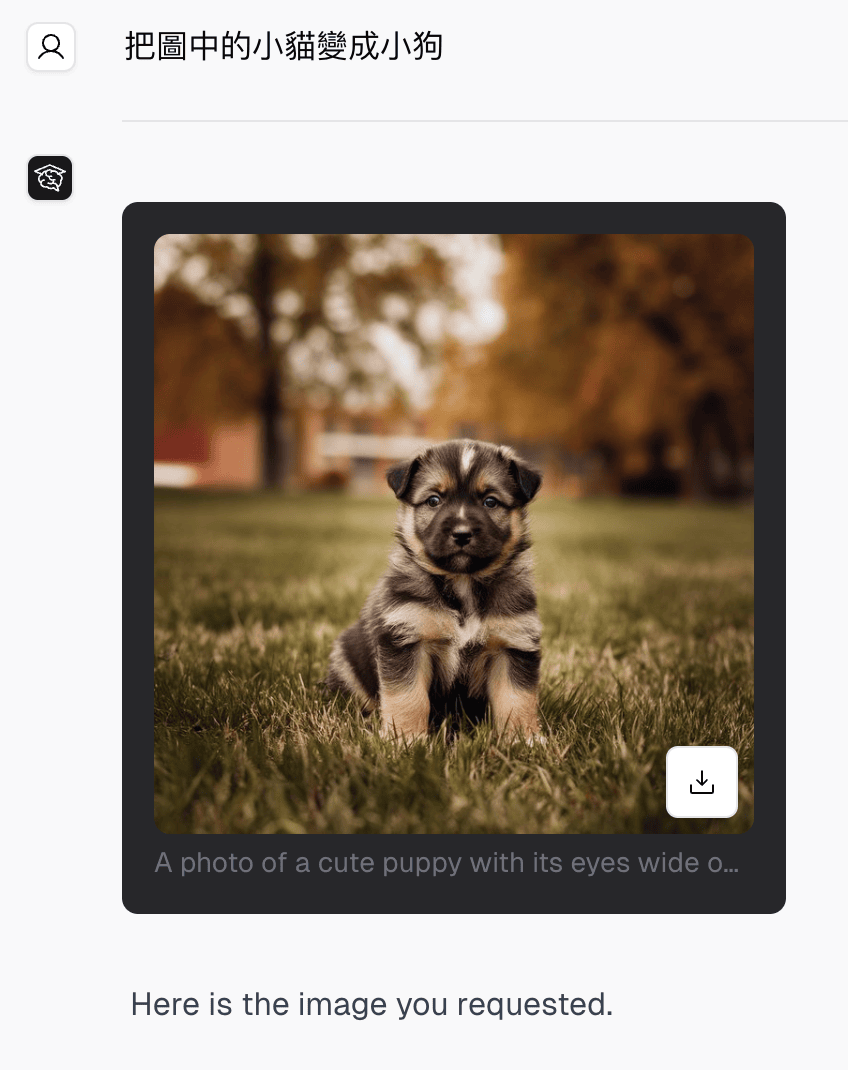
For a complete edit and remix walkthrough, see the image remix demo .
Example prompt:
Keep the subject the same, remove the background, and replace it with a modern office scene with warm lighting.Edit a Generated Image on the Whiteboard
Use this when you want to change only one part of an image, such as a background object, a face, or a piece of text.
- Find an image generated with GPT Image 2 in the conversation.
- Click the pen icon (Edit image) in the bottom-left corner of the image. The whiteboard opens with the image loaded.
- Choose Select area and paint over the part of the image you want to change. The painted area is highlighted in light blue.
- Use Undo and Redo to adjust your selection, or click Reset to start over from the original image.
- Click Attach. The marked-up image is attached to your message.
- In the message box, which shows Describe the change for the image…, type what should change in the selected area.
- Send the message. The AI edits only the painted area and keeps the rest of the image as close to the original as possible. The blue highlight does not appear in the result.
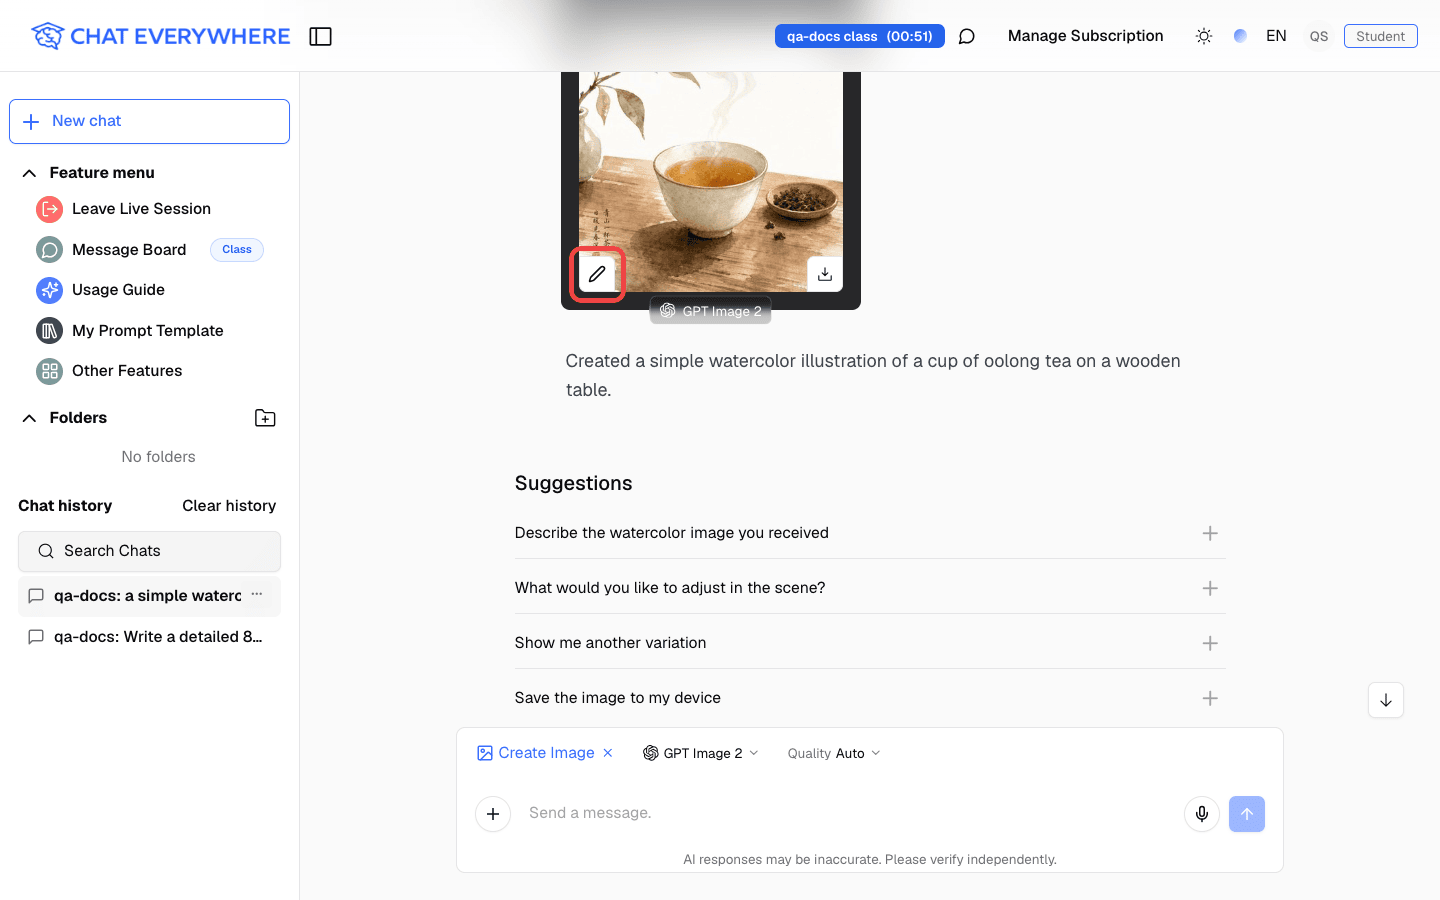
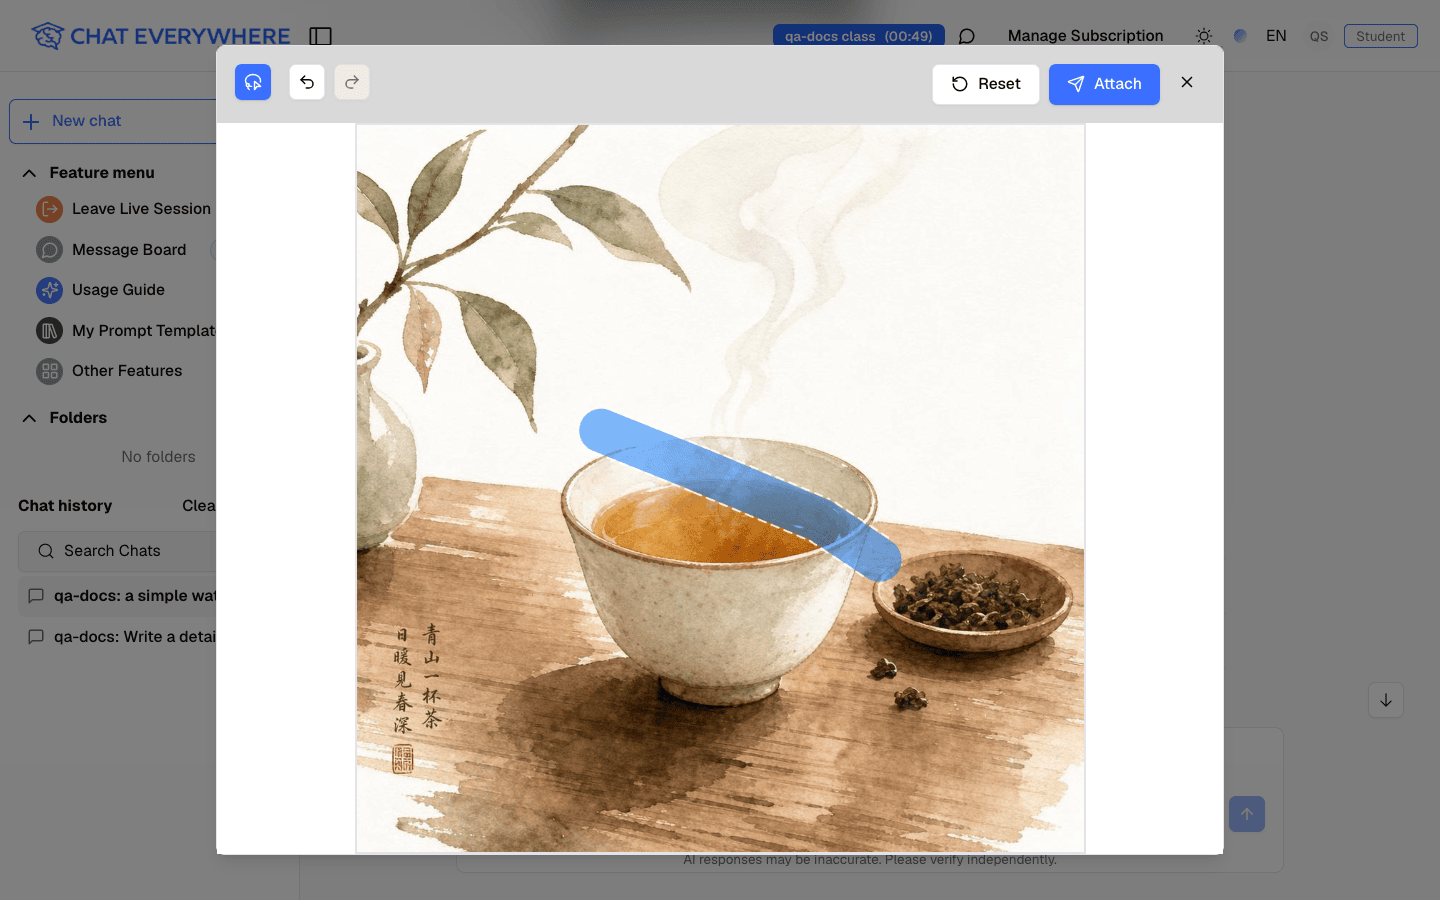
Example prompt:
Replace the coffee cup with a small potted plant.The Edit image button appears on images created with GPT Image 2. Images created with Nano Banana 2 do not show this button — to change them, upload the image and describe the edit instead.
Choose the Model in Your Prompting Workflow
In Create Image mode, the model selector in the chat toolbar lets you choose a model before generating:
- Nano Banana 2 — labeled Generate
- GPT Image 2 — labeled Generate + edit
When GPT Image 2 is selected, you can also set Quality to Auto, Low, Medium, or High. Both models use the same prompt-based workflow, so you can write prompts the same way regardless of which model you pick.
Prompt Tips
- Name the subject clearly.
- Include the style, mood, and lighting.
- Describe composition such as close-up, portrait, wide shot, or top-down.
- Specify important background details instead of leaving them implied.
- If the image needs text, include the exact wording.
- For edits, say what must change and what must stay the same.
- For whiteboard edits, paint slightly beyond the edges of the object you want to change, and describe only the change for that area.
Plans & Access
Image Generation is available on the Ultra plan.
Common Questions
Which models are supported? Chat Everywhere currently supports GPT Image 2 and Nano Banana 2 for image generation.
Can I edit an existing image instead of creating a new one? Yes. Upload the image, then describe the changes you want in your prompt.
Can I change only part of a generated image? Yes. For an image created with GPT Image 2, click Edit image, paint over the area with Select area, click Attach, and describe the change. The AI keeps the unselected parts of the image unchanged.
Why don’t I see the Edit image button on my image? The whiteboard edit button is only available on images generated with GPT Image 2. For other images, upload the image in Create Image mode and describe the edit in your prompt.
Can I ask for transparent backgrounds or a specific style?
Yes. Include details such as transparent background, flat illustration, photorealistic, or watercolor poster directly in your prompt.